NetApp Data Availability Services is a cloud-based
service to manage data protection workflows from ONTAP primary to secondary
storage systems to the cloud, and across multiple public clouds.
Benefits of using NetApp Data
Availability Services
·
Protect your
data with simplified management and powerful features.
· Eliminate
management complexity through a cloud-native interface and simple, automated workflows.
·
Easily search
and recover lost data—on-premises or in the cloud.
·
Minimize backup
costs by eliminating additional infrastructure.
·
Replicate data
securely from any ONTAP storage—on premises or in the cloud.
·
Back up ONTAP
data directly to an object container.
·
Unleash new
cloud applications and services by creating active copies of your data in the
cloud.
· Maximize data
reuse on secondary ONTAP storage to accelerate software development, testing, analytics, and reporting.
The NDAS
feature is only available with ONTAP 9.5., data from ONTAP primary systems can be backed up to the
secondary ONTAP target (running the NDAS proxy and the Copy to Cloud API), and then to AWS S3 buckets in the cloud.

Login to NetApp Data Availability Services (NDAS) Portal.

Using this NDAS you can protect the volumes to Disk or Cloud.
Dashboard view of NDAS.

IN this dash board, you can see the complete protection Environment also.

First create a Target Disk.

Add ONTAP Target using this configuration key .


Login to OnCommand System Manager.

Configuration--> Cloud Registration
Paste the NDAS Configuration Key and Register.


Successfully ONTAP Cluster registered successfully.

Login to NDAS, then authenticate the Disk Target.

Provide the ONTAP Cluster user and Password information to authenticate.

Once authentication successful, you can see the SVM information.

For Peer Cluster authentication provide source cluster information.

Provide Source cluster user name and password to authenticate.
Source Cluster ---- cluster1
Target cluster ----- cluster2


After successful Authentication, clusters are peered.

In dashboard, you can see the discovered volume information.


Next configure the remote cloud target.
Select the AWS Cloud.

Provide the AWS Cloud S3 Access Key information.


Once authentication successful, it added with cloud target also.

Data Protection policy information.

Now select Data Protection and Select the volume to protect.


Select the protection policy and click protect.

Snapmirror protect initiated.

You can check this activity in Activity tab.


Data Protection successfully done.

You can configure multiple volumes also in a single stroke.


Accessing the cifs share from the source cluster.

Deleting one file and try to restore from NDAS.

File Deleted.

IN NDAS, Restore tab search the file.
Using this, you can restore a volume, LUN or File.

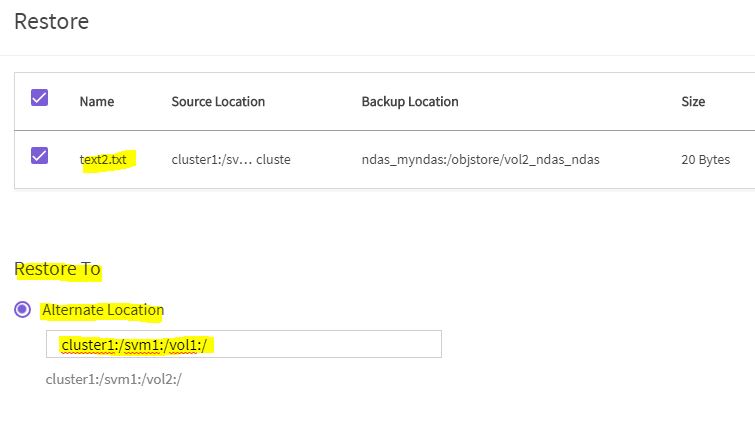
Select the file to restore and go for restore.

You can restore a file to the original location or alternate location also.


Check the job activities, restore job initiated.

Once the job succeeded, then check file in share folder.

Restore for another location in vol1.

File restored in another location.

Volume restore :
Create a new DP volume.


Restore an entire volume in NDAS with alternate location with new DP volume.


Once job succeeded , mount the new DP volume and check the files.

Now you can see the new folder mounted and its has all the data.


Good and Informative Blog! aws backup service
ReplyDelete