Friday, March 27, 2020

NetBackup 8.1.2 NDMP Backup - EMC Isilon


NetBackup for NDMP

NetBackup for NDMP is an optional NetBackup application. It enables NetBackup to use the Network Data Management Protocol (NDMP) to initiate and control backups and restores of Network Attached Storage (NAS) systems.

NDMP policies in NetBackup

After you install and configure NetBackup for NDMP, you can schedule backups by creating an NDMP policy in NetBackup.
An NDMP policy can have one or more NetBackup clients. Each NetBackup client must be an NDMP host.

The allowable backup types for schedules in an NDMP policy are: Full, Cumulative Incremental, or Differential Incremental. User-initiated backups and archives are not allowed because the NDMP protocol does not permit these tasks.

Restores of NDMP host backups can be initiated from any NetBackup media server that meets the following criteria:
·        Resides within the same overall NetBackup storage domain
·        Uses the same NetBackup master server that the media server uses to perform the backup


1. Login to EMC Isilon, and check the NDMP service is enabled or not.

# isi ndmp settings global view

If it is not enabled then use the following command.

#isi ndmp settings global modify --service=True


2. Create a NDMP user in EMC Isilon. 


3. Login to NetBackup Admin Console, Create a new NDMP Host.

My EMC isilon IP Add : 10.0.0.170


4. Provide the NDMP User name and Password for authentication.


5. NDMP (EMC Isilon) Added successfully.


6. Create a new backup policy with NDMP Policy Type.


7. Create a Schedule for the Backup, Backup Types and Retention.


8. Then, Add the NDMP Host in the Clients section.


9. Select the file pools to take a backup. 


10. Policy created successfully. To test this take a manual backup.


11. Backup is initiated successfully. We can monitor this in Activity Monitor.


12. In a detailed job status, we can able to see the connection with EMC Isilon and taking backup through NDMP.


13. Backup job done successfully with status code 0.


14. Now, I am accessing the SMB share from EMC Isilon, and delete the file.


15. To restore, Open a NetBackup BAR and Select the files to restore.


16. Restore Properties.


17. Restore job done successfully with status code 0.


18. I am checking in SMB share, I can able to see the deleted file.
So restore done successfully.


For Further Reading :

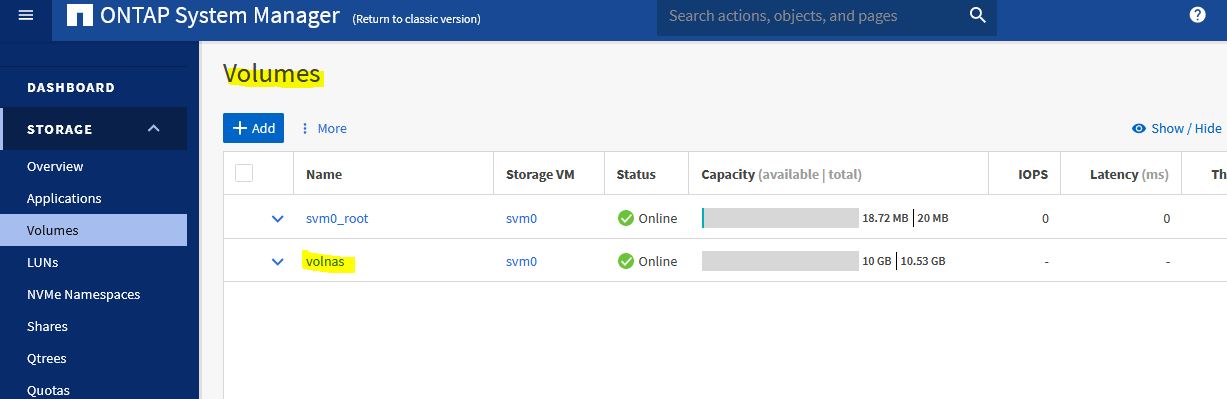
NDMP Backup Configuration NetApp ONTAP 9.7

NetBackup Oracle RMAN Backup

Wednesday, March 11, 2020

NetApp ONTAP 9.7 Cluster Setup Using ONTAP System Manager


NetApp ONTAP 9.7 System Manager:

NetApp ONTAP 9.7 is the latest version of NetApp’s proven data management software. You can run ONTAP in your data center on NetApp-engineered hardware, on your commodity hardware, or in any of the major public clouds.

The most noticeable feature of ONTAP 9.7 is the all-new ONTAP System Manager interface. This web-based interface gets you up and running with just a few clicks.

ONTAP System Manager gives you a clear visual of the status of your cluster and guides you on the best ways to achieve your storage goals.

You can quickly create a cluster and configure ONTAP software for your cluster. System Manager provides a simple and easy workflow for setting up the cluster and configuring storage.


Steps to ONTAP 9.7 Cluster Setup:

1. Assign Node Management IP and access using the IP address.
2. Initialize the Cluster
3. Create a Local Tier (Aggregate)
4. Create SVM and Configure Protocols.
5. Provision Initial Storage.


In Node1 and Node2, set the Node Management IP address.


Access the Node Management IP in Web Browser and Initialize the storage system.


Set the Cluster name, Password, Cluster Management IP, DNS and NTP server details.


Configuring the Cluster.


Once the cluster configured, automatically redirect to the cluster management IP.


2 Nodes are connected in HA.


Add License to enable the protocols.


List the licenses information.


Then Prepare the storage. Creating Local Tier (Aggregate).


Adding Local Tiers (Aggregates).


Then, Configure the Protocols.


Set the SVM name and Enable the access Protocols.


For SMB/CIFS Authentication, add the Active domain information.


For NAS, Create a LIF.


Now this will configure the access protocols.


Check the SVM and the Protocols.


Enabling and Configuring iSCSI Protocol.


Then Provisioning Storage (Volumes and Shares)


Adding volumes for NAS Share.


Creating Volumes as per the information given.


Volumes created successfully.


SMB Share also created successfully.


We can access the share from windows server.


Now mount the NFS share in linux server.


Create a LUN with name, Size and Igroup initiators.


Creating a LUN and it is mapped to igroup.


Discover the LUN from linux server using the following command.


You can the connected LUN's from NetApp.


Data Protection (SnapMirror):

Select volume and protect.


Adding the Snapmirror relationship and initializes it.