NetApp ONTAP 9.7 System Manager:
NetApp ONTAP 9.7 is the
latest version of NetApp’s proven data management software. You can run ONTAP
in your data center on NetApp-engineered hardware, on your commodity hardware,
or in any of the major public clouds.
The most noticeable
feature of ONTAP 9.7 is the all-new ONTAP System Manager interface. This
web-based interface gets you up and running with just a few clicks.
ONTAP System Manager
gives you a clear visual of the status of your cluster and guides you on the
best ways to achieve your storage goals.
You can quickly create a
cluster and configure ONTAP software for your cluster. System Manager provides
a simple and easy workflow for setting up the cluster and configuring storage.
Steps to ONTAP 9.7 Cluster Setup:
1. Assign Node Management IP and access using the IP address.2. Initialize the Cluster
3. Create a Local Tier (Aggregate)
4. Create SVM and Configure Protocols.
5. Provision Initial Storage.

In Node1 and Node2, set the Node Management IP address.


Access the Node Management IP in Web Browser and Initialize the storage system.

Set the Cluster name, Password, Cluster Management IP, DNS and NTP server details.

Configuring the Cluster.

Once the cluster configured, automatically redirect to the cluster management IP.


2 Nodes are connected in HA.

Add License to enable the protocols.
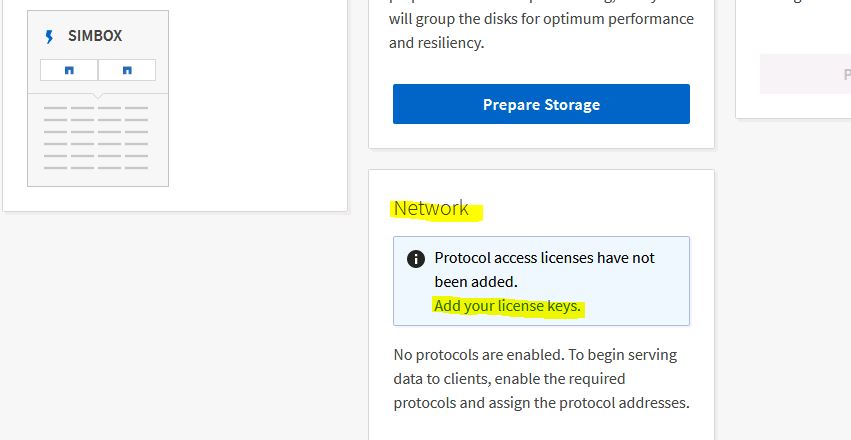

List the licenses information.

Then Prepare the storage. Creating Local Tier (Aggregate).

Adding Local Tiers (Aggregates).


Then, Configure the Protocols.

Set the SVM name and Enable the access Protocols.

For SMB/CIFS Authentication, add the Active domain information.

For NAS, Create a LIF.

Now this will configure the access protocols.

Check the SVM and the Protocols.

Enabling and Configuring iSCSI Protocol.

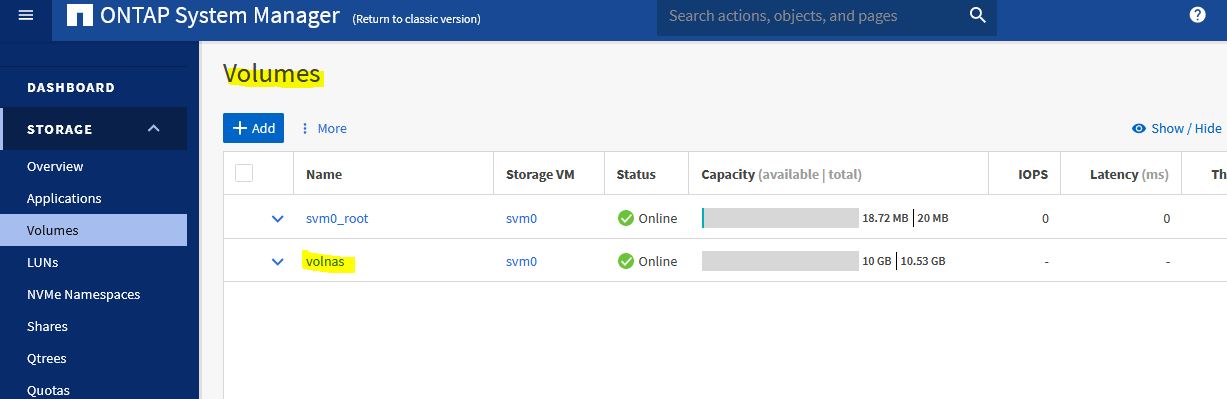
Then Provisioning Storage (Volumes and Shares)


Adding volumes for NAS Share.

Creating Volumes as per the information given.

Volumes created successfully.
SMB Share also created successfully.

We can access the share from windows server.

Now mount the NFS share in linux server.

Create a LUN with name, Size and Igroup initiators.

Creating a LUN and it is mapped to igroup.


Discover the LUN from linux server using the following command.

You can the connected LUN's from NetApp.

Data Protection (SnapMirror):
Select volume and protect.
Adding the Snapmirror relationship and initializes it.


Look at this website :) you need a help ? IT Infrastructure Management it's a great! Recently, I am interested in new systems and software.
ReplyDeleteNice blog :)
very good document, please update more information, Best of luck
ReplyDeletethank so much, your save my life
ReplyDelete