Iscsi Target Configuration in Linux
iSCSI is a block
level Protocol for sharing RAW Storage Devices over TCP/IP
Networks, Sharing and accessing Storage over iSCSI, can be used with existing
IP and Ethernet networks such as NICs, Switched, Routers etc. iSCSI target is a
remote hard disk presented from an remote iSCSI server (or) target.
Features
of iSCSI Target
§
Possible to run several iSCSI targets on a single machine.
§
A single machine making multiple iscsi target available on the
iSCSI SAN
§
The target is the Storage and makes it available for initiator
(Client) over the network
§
These Storage’s are Pooled together to make available to the
network is iSCSI LUNs (Logical Unit Number).
§
iSCSI supports multiple connections within the same session
§
iSCSI initiator discover the targets in network then
authenticating and login with LUNs, to get the remote storage locally.
1. Check whether the iscsi target has been installed or not. If it is not installed, install using YUM or RPM -ivh command.

2. Check the target daemon status and if it is not started, start the daemon.

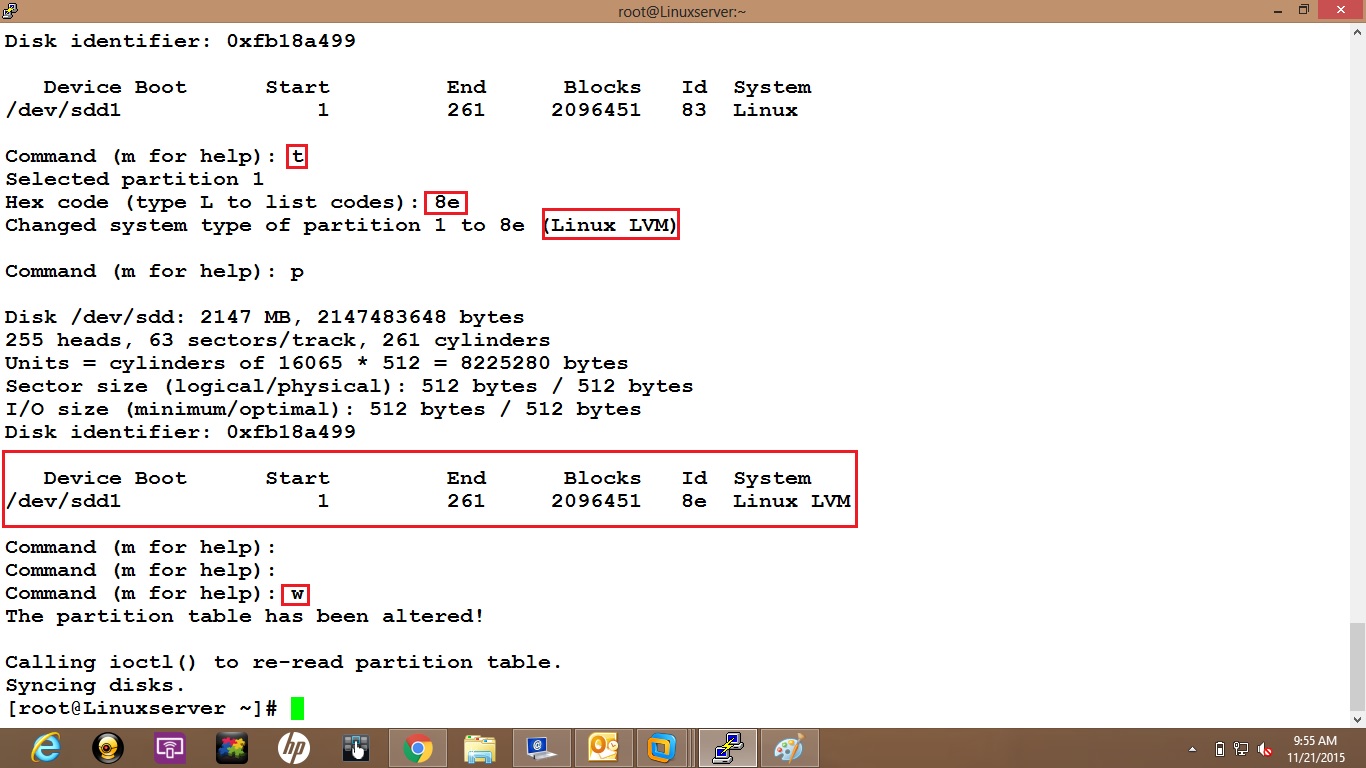
3. Create the partition on new disk which supports LVM.


4. Now create a physical volume using the above partitions.

5. Create a volume group.

6. Create a Logical Volumes, and these logical volumes are act as LUN's.

7. Edit targets.conf file.


8. Reload the file configuration immediately.

9. From the host side, windows server check the disk drive information from the device manager.

10. Add the target portal information in iscsi initiator application.

11. Once the discovery portal added, then this will discover the assigned LUN's from the iscsi storage.

12. Login to the device.

13. Now the RAW disk is added to the windows host.


14. Now do the disk management like Disk partition, Format and Mount.

15. Same as you can discover the LUN from linux also. First check the iscsi initiator has been installed.

16. Add the target portal information.

17. Now you can able to see the new disks in linux server.


No comments:
Post a Comment