NIS Configuration Steps:
The Network Information Service, or NIS (originally called Yellow Pages or YP)
is a client–server directory service protocol for distributing system configuration
data such as user and host names between computers on a computer
network. Sun Microsystems developed the NIS; the technology is
licensed to virtually all other Unix vendors.
Because British
Telecom PLC owned the name "Yellow
Pages" as a registered trademark in the United Kingdom for its paper-based, commercial telephone directory, Sun changed the
name of its system to NIS, though all the commands and functions still start
with “yp”.
An NIS/YP system maintains and distributes a central directory of
user and group information, hostnames, e-mail aliases and other text-based
tables of information in a computer network. For example, in a common UNIX environment,
the list of users for identification is placed in /etc/passwd, and
secret authentication hashes in /etc/shadow. NIS
adds another “global” user list which is used for identifying users on any client of the NIS domain.
Network
Information Services (NIS) enables you to create user accounts that can be
shared across all systems on your network. The user account is created only on
the NIS server. NIS clients download the necessary username and password data
from the NIS server to verify each user login.
An advantage of NIS is that users need to change their passwords
on the NIS server only, instead of every system on the network. This makes NIS
popular in computer training labs, distributed software development projects or
any other situation where groups of people have to share many different
computers.
The disadvantages are that NIS doesn't encrypt the username and
password information sent to the clients with each login and that all users
have access to the encrypted passwords stored on the NIS server. A detailed
analysis of NIS security is beyond the scope of this book, but I suggest that
you restrict its use to highly secure networks or to networks where access to
non-NIS networks is highly restricted.
Real Time Example:
§ The main Linux server, nismaster
(192.168.1.222), has a large amount of disk space and will be used as both the
NIS server and NFS-based file server for the Linux PCs in this example.
§ Users logging into the PCs
will be assigned home directories on nismaster and not on the PCs themselves.
§ Each user's home directory
will be automatically mounted with each user login on the PCs using NFS.
§ To configure the NIS client
and NFS client, we are using the nisslave (192.168.1.223).
§ The suite of NIS RPMs have
been installed on the server and client: ypserve and yp-tools are on the
server, and ypbind and yp-tools are on the client.
An implementation plan:
1. Configure nismaster as an
NFS server to make its /home directory available to the Linux workstations.
2. Configure nisslave as an
NFS client that can access bigboy's /home directory.
3. Configure nismaster as an
NIS server.
4. Create a user account (testsenthil)
on nismaster that doesn't exist on nisslavey. Convert the account to a NIS user
account.
5. Configure nisslave as an
NIS client.
6. Test a remote login from nisslave
to nismaster using the username and password of the account testsenthil.
First check the ypserver packages are installed or not.
To check this use the following command:
rpm -qa | grep yp

Check the following daemons are running.
service xinetd status
service portmap status
rpcinfo -p <ipaddress>

Configure the NFS server.
The main NFS configuration file is /etc/exports
Edit the /etc/exports file and add which filesystem to export.

Add the /home filesystem and access from any system with read write.
/home * (rw, sync)

Now start the NFS daemon.
service nfs start

exportfs command used to list the exported filesystem in /etc/exports file.

rpcinfo -p 192.168.1.222

Now all the nfs, mountd and lockd are running successfully.

The main NIS configuration file is /etc/ypserv.conf.

Edit the ypserv.conf file.

Edit and add the nisdomain name in /etc/sysconfig/network file.

nisdomain=fbtnis

Now check the ypserv daemon is running or not using the following command.
service ypserv status
service ypserv start
Check the NISdomainname using the following command.
nisdomainname

Now start the ypbind daemon.
service ypbind start


Start the yppasswdd and ypxfrd daemons.
service yppasswdd start
service ypxfrd start
If you want to start all the daemons, while booting time then do the following commands.
chkconfig --list
chkconfig portmap on
chkconfig nfs on
chkconfig ypserv on
chkconfig ypbind on
chkconfig yppasswd on
chkconfig ypxfrd on

List the rpcinfo -p 192.168.1.222

The nis files are stored in /var/yp/nisdomainname

Now we move on to client side and do the following commands.
The host name of the client is nisslave and the ipaddress is 192.168.1.223

Now we are checking the user's home directory.

We need to configure the autofs in the client side. For this we need to edit /etc/auto.home and /etc/auto.master files.

Add the following contents.

Edit the /etc/auto.home file and the add the contents.


Now start the autofs daemon.
service autofs start.
Use the mount to list the mounted file system.

Listing the home directories. As of now we don't have any users.

To configure a NIS client use the following command.
authconfig

select the NIS Authentication.

Provide the nisdomainanme and ipaddress of the NIS master server.

Now start the ypbind daemon.
service ypbind start

rpcinfo -p 192.168.1.223

Now ypbind is running.

ypwhich command lists the nis server information.

Now in the NIS master server side, create the new user account.
useradd testsenthil
passwd testsenthil

The user created successfully.

Now check in the nis client system, we don't have user called testsenthil.


If trying log in, which is failed.

If any changes in the nis master server, we need to run the make command.
/var/yp
make

Now the passwd changes are mapped.

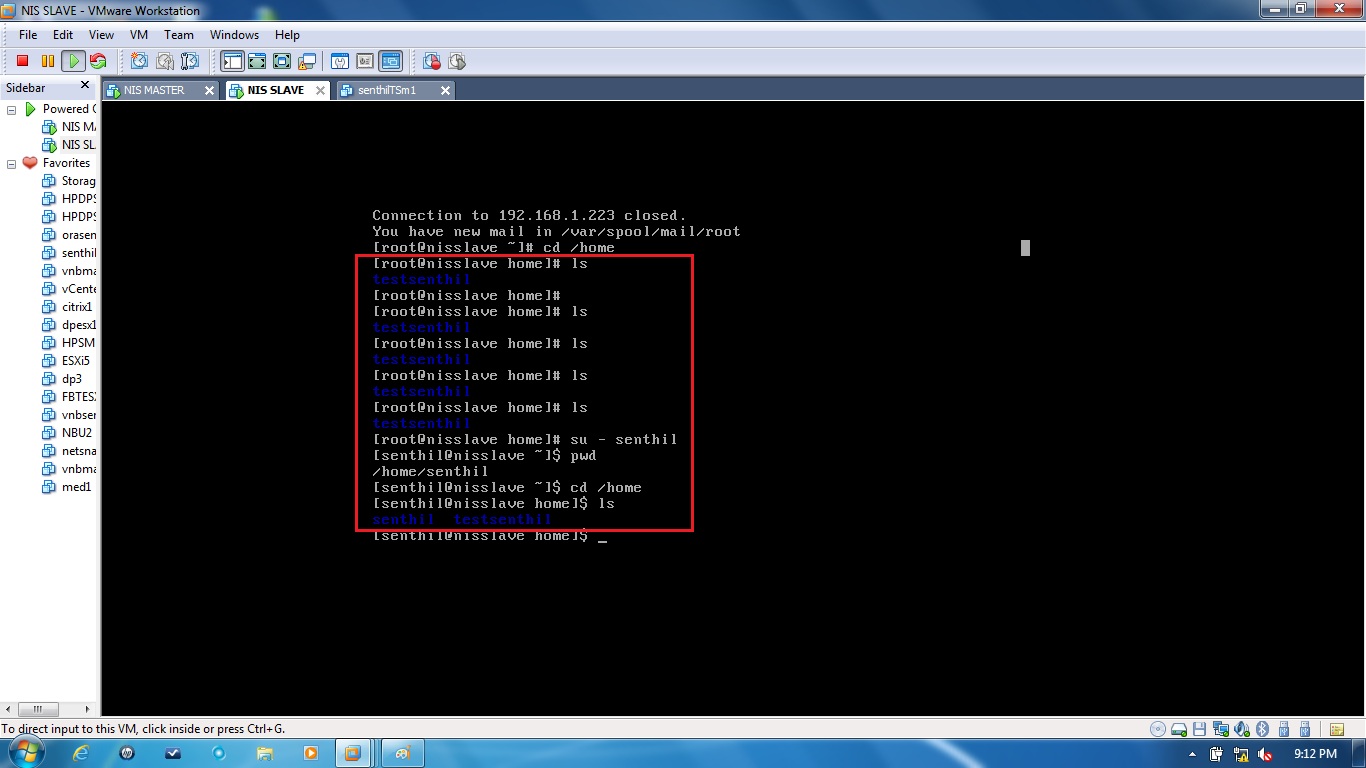
Now the testsenthil user able to login in the remote server.

The only user's home directory alone mounted in home. (Help of autofs)

Now user has logged in.
thanks a lot sir....so useful :)
ReplyDelete