Sunday, February 26, 2017

NetApp ONTAP 9.1 CLI Cluster Setup


ONTAP 9.1 CLI Cluster Setup:


In Node1 and Node2, either we can do it through web browser using guided cluster setup or CLI.


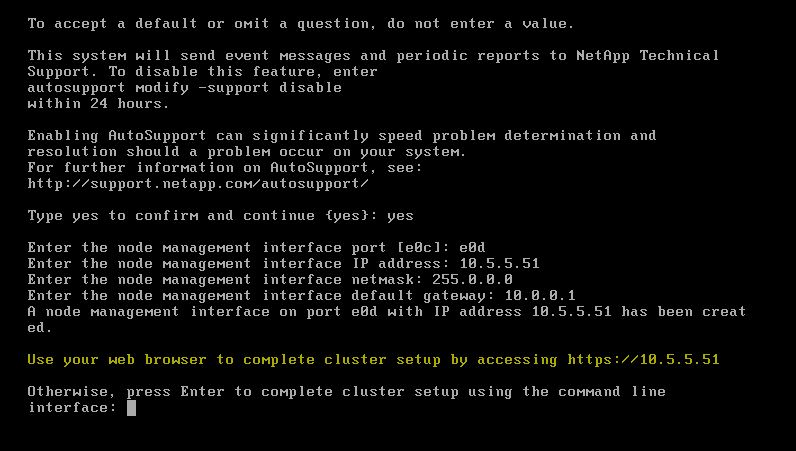
First node you start with cluster create.
Select this setup is the single node cluster or switched or switch less multi node cluster.

Default e0a and e0b interface will be used for cluster network.

Set admin password.


It is creating cluster network setup first.
Add the cluster base license now.


Now add the additional feature license.


Set the cluster management interface and ip address.


Set the controller location.


Now go to second node, node2 and join to an existing cluster.

Select the default cluster network interface like e0a and e0b.
Then select the name of an existing cluster name to join.


Joining to the cluster.


Now node2 also ready.


Cluster show command lists the status of the nodes.

Master node, node1 will have an Epsilon also.


List the interface information using network interface show.


Now connect from web browser using system manager.


System Manager 9.1 New dash board.
You can able to see the two nodes.


Listing the disks information. FCAL and SSD disks also.


Setting the time zone and NTP server information.


Listing the time stamp of the cluster nodes.


Modifying the time stamp.


Friday, February 24, 2017

NetApp ONTAP 9.1 Guided Cluster Setup


ONTAP 9.1 Cluster Setup and New Features:

New Features:
ONTAP 9.1 brings:
  • Tons of brand new platforms
  • NetApp FlexGroup (GA) with Unified Manager.
  • NetApp Volume Encryption (NVE)
  • SnapMirror to AltaVault/cloud
  • 12 node SAN clusters
  • Native Foreign LUN Import with AFF support (no PVR needed!)
  • System Manager improvements (FlexGroup GUI, storage efficiency reporting, new cluster setup workflow)
  • SAP HANA support for AFF templates
  • Azure support for ONTAP cloud
  • Trusted Platform Module
  • 32GB FC
  • SMB 3.1.1 AES-128-GCM encryption (~1.7 times faster than CCM in ONTAP 9.0!)
  • 40GB Ethernet
Cluster Setup:

1. Once you set the node Management IP and Port then you can do configure using CLI or System Manager.


2. Access through the Node Management IP. You can use the Config CSV files or Guided setup.


3. This will discover the nodes, set the cluster name and optionally add the license information.


4. Network Configuration.
Setting the Cluster Management Portt and IP. DNS and NTP server information.


5. Support Configuration.
Setting auto support config and Event logs Management details.
System Config backup location also.


6. Now the Cluster setup is done successfully. Now you can access from cluster mgmt ip and manage the cluster.

 7. Access through your cluster management ip and Login.


8. This is the new enhanced dash board in ONTAP 9.1


9. Creating a new aggregates.


10. New RAID level RAID-TEC which supports up to 3 HDD failure.


11. You can create a SVM.


12. SVM successfully created.


13. Flexvol creation.


14. Flexgroup volume creation.

A FlexGroup volume is a scale-out NAS container that leverages the cluster resources to provide performance and scale. FlexGroup volumes provide high performance along with automatic load distribution and scalability.
A FlexGroup volume contains a number of constituents that automatically and transparently share a traffic load. 


15. Now you can create a flexgroup volumes.