Saturday, March 9, 2013

NetApp ONTAP Edge Deployment on ESXi5 and Storage Configuration


NetApp ONTAP Edge Configuration:


NetApp Data ONTAP Edge is a low cost remote office storage solution that runs on the VMware vSphere platform. Designed to complement NetApp FAS and V-Series storage Solutions, Data ONTAP Edge alloes you to build a data center on an enterprise server using the VMware vSphere platform. 


Data ONTAP Edge converts the server’s internal disk drives into a flexible storage platform, giving you many of the same benefits as a dedicated NetApp Storage System.

Data ONTAP Edge includes the NetApp Data ONTAP-v operating system, whose native data deduplication and FlexClone, SnapVault and SnapRestore software leverages your central site’s netApp storage system for data backup, data recovery and archiving of remote-site data.

The result is that your remote offices can participate in your shared IT infrastructure with the same levels of efficience and flexibility that Data ONTAP provides in your data center.

Download the NetApp ONTAP Edge ova from Now site.


Deploy the NetApp Edge ova to the existing VMware vSphere Server.

Login to the vSphere server via VMware vCenter and click the deploy the ova or ovf menu.


Select the ova file location in the local system.
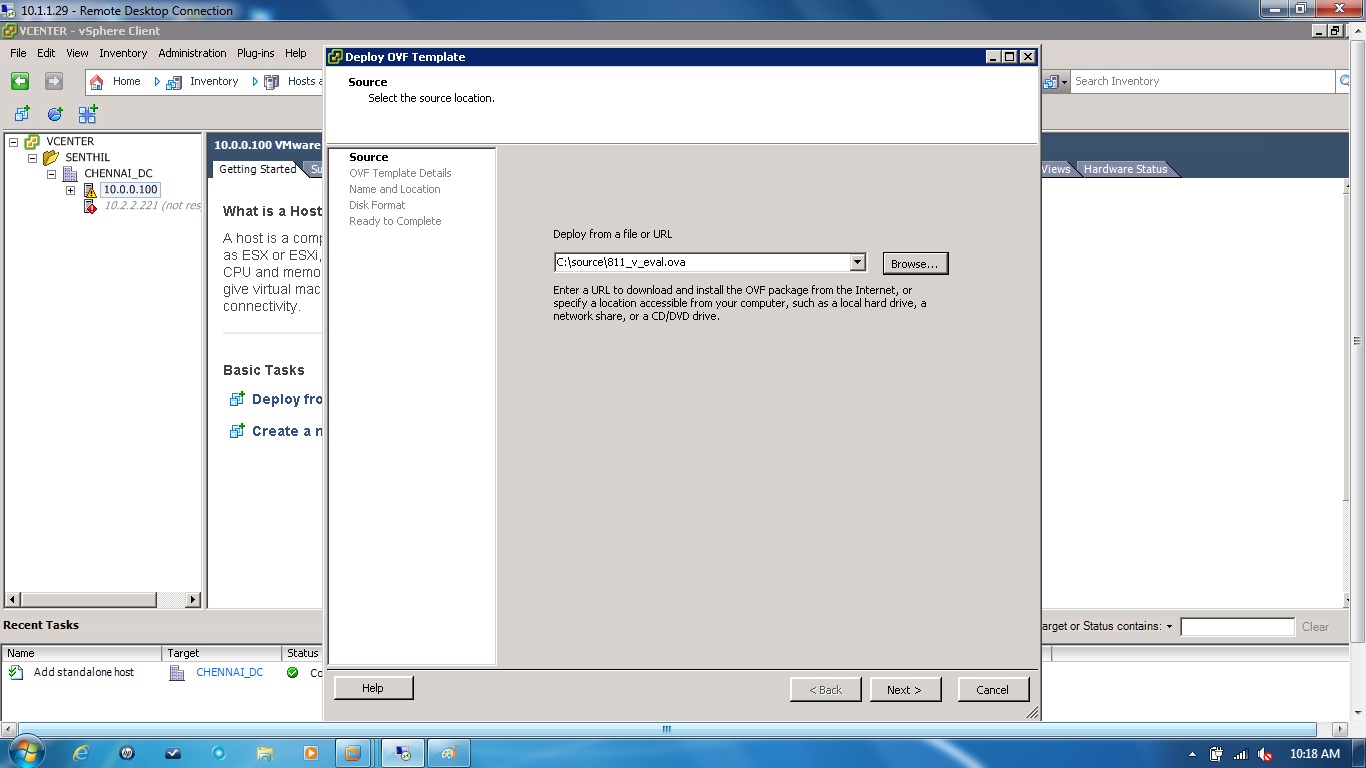


It identifies the NetApp Ova.


Accept the end user license.


Select the vSphere server and the data center where you want to deploy the Edge.


Specify the Disk information.


Host operating system properties like hostname, ipaddress, subnet mask, gateway and root password.


Specify the vmnetwork to access the NetApp Edge.


Deployment summary.


Now it is deploying to the ESXi server.


Now it is successfully deployed and power on the Edge ONTAP server.


The ONTAP Edge powered on and it will do the auto setup.


Now you can able to login to the Edge.


Access the ONTAP Edge through the NetApp oncommand system manager.

Add the system to manage.


The NetApp ONTAP Edge server successfully added.


Now you can login to the NetApp Edge and you can see the dash board.


Access the NetApp ONTAP Edge via SSH using putty. Login to the NetApp and list the available disks.

Issue the command storage show


Adding more disks to the NetApp ONTAP Edge using vCenter.


Specify the size and repeat the same steps and add more disks.


If you run the disk show command, you will all the status with un-owned disk also.


Assign the disks to the Edge using disk assign command.


List the existing aggregate.


Now you can create a new aggregate with the new disks.


You can create volumes also.


Rest of all other are same in real filers. This is only a virtual Operating System which act as a filer.


Tuesday, January 8, 2013

NetApp Snap Creator Introduction Tutorial


NetApp Snap Creator:


Snap Creator is a backup and recovery software solution that enables you to integrate Snapshot technology with any application that is not supported by SnapManager products.

Snap Creator is platform and operating system independent. It provides application integration through plug-ins that enable it to support any application on a storage system. Snap Creator uses the plug-ins to handle quiesce and unquiesce actions for a given application or database.

Snap Creator supports application plug-ins for Oracle, DB2, MySQL, Sybase ASE (Sybase), Lotus Domino (Domino), SnapManager for Microsoft SQL Server, SnapManager for Microsoft Exchange, MaxDB, VMware (vSphere and vCloud Director), Red Hat KVM, and Citrix Xen. Additional application plug-ins are available through the Snap Creator Community.

Snap Creator provides a management interface for Snapshot technology, SnapVault, Open Systems SnapVault, SnapMirror, Protection Manager, Operations Manager, and FlexClone technology.

Snap Creator Architecture:


Snap Creator consists of a server and an agent layer. The GUI, configuration, and CLI reside in the server. The server sends quiesce or unquiesce operations to a given database by using the agent, which runs remotely or locally.

The communication layer from the agent to the server is Simple Object Access Protocol (SOAP) over HTTP.


Download the NetApp Snap Creator Software from NOW website.

Install the NetApp Snap Creator (Server) software in windows 2003/2008 server.

Access the Snap Creator using server ipaddress or hostname with port number 8080.

Kindly check the Snap Creator service is up and running.

While installation, it could prompt you to create user account to login.

Access Snap Creator with your hostname or ipaddress.

http://hostname:8080

It will prompt you to authenticate the privileged user account.


Once it authenticated successfully, it will open the dash board.
It has 3 main sections:

1. Management
2. Data
3. Reports


In Management Tab, you can create new backup configuration.

Add a new profile.


Create a new configuration.


New Configuration Wizard.


It prompts you to give the new config name and authentication type.


It prompts you select which type  of plug-in 

The following plugin's are available.

1. Application Plugin 
2. Virtualization Plugin
3. Community Plugin
4. None.


Select your transport type.
http or https.


Storage Controller Information like ipaddress, username and password.


Automatically it discovers the volumes and clone information.


Now you can configure the snap and retention details.


Configure your Snap mirror and Snap Vault information.


Data Protection volumes.


Configuration Summary.


Data volumes.


Listing the Snapshots.


Listing Volume Clone information.


you can schedule the tasks.


Tasks .